Size & Resolutions
LED Wall Resolution
-
Volume Raster: 7,440x2160
-
Left Wall: 1,800x1,200
-
Main Wall: 3840x2160
-
Right Wall: 1,800x1,200
-
Ceiling: 768x896

-
Volume: 55' x 9’ 6“
-
Left Wall: 9’ 6” x 13’ 4”” x 9’ 6“
-
Main Wall: 17' x 9’ 6“
-
Right Wall: 9’ 6” x 13’ 4”” x 9’ 6“
-
Ceiling: 9’ 6” x 13’ 4”
LED Wall Dimensions
Content Layouts
Single Video File Full Screen
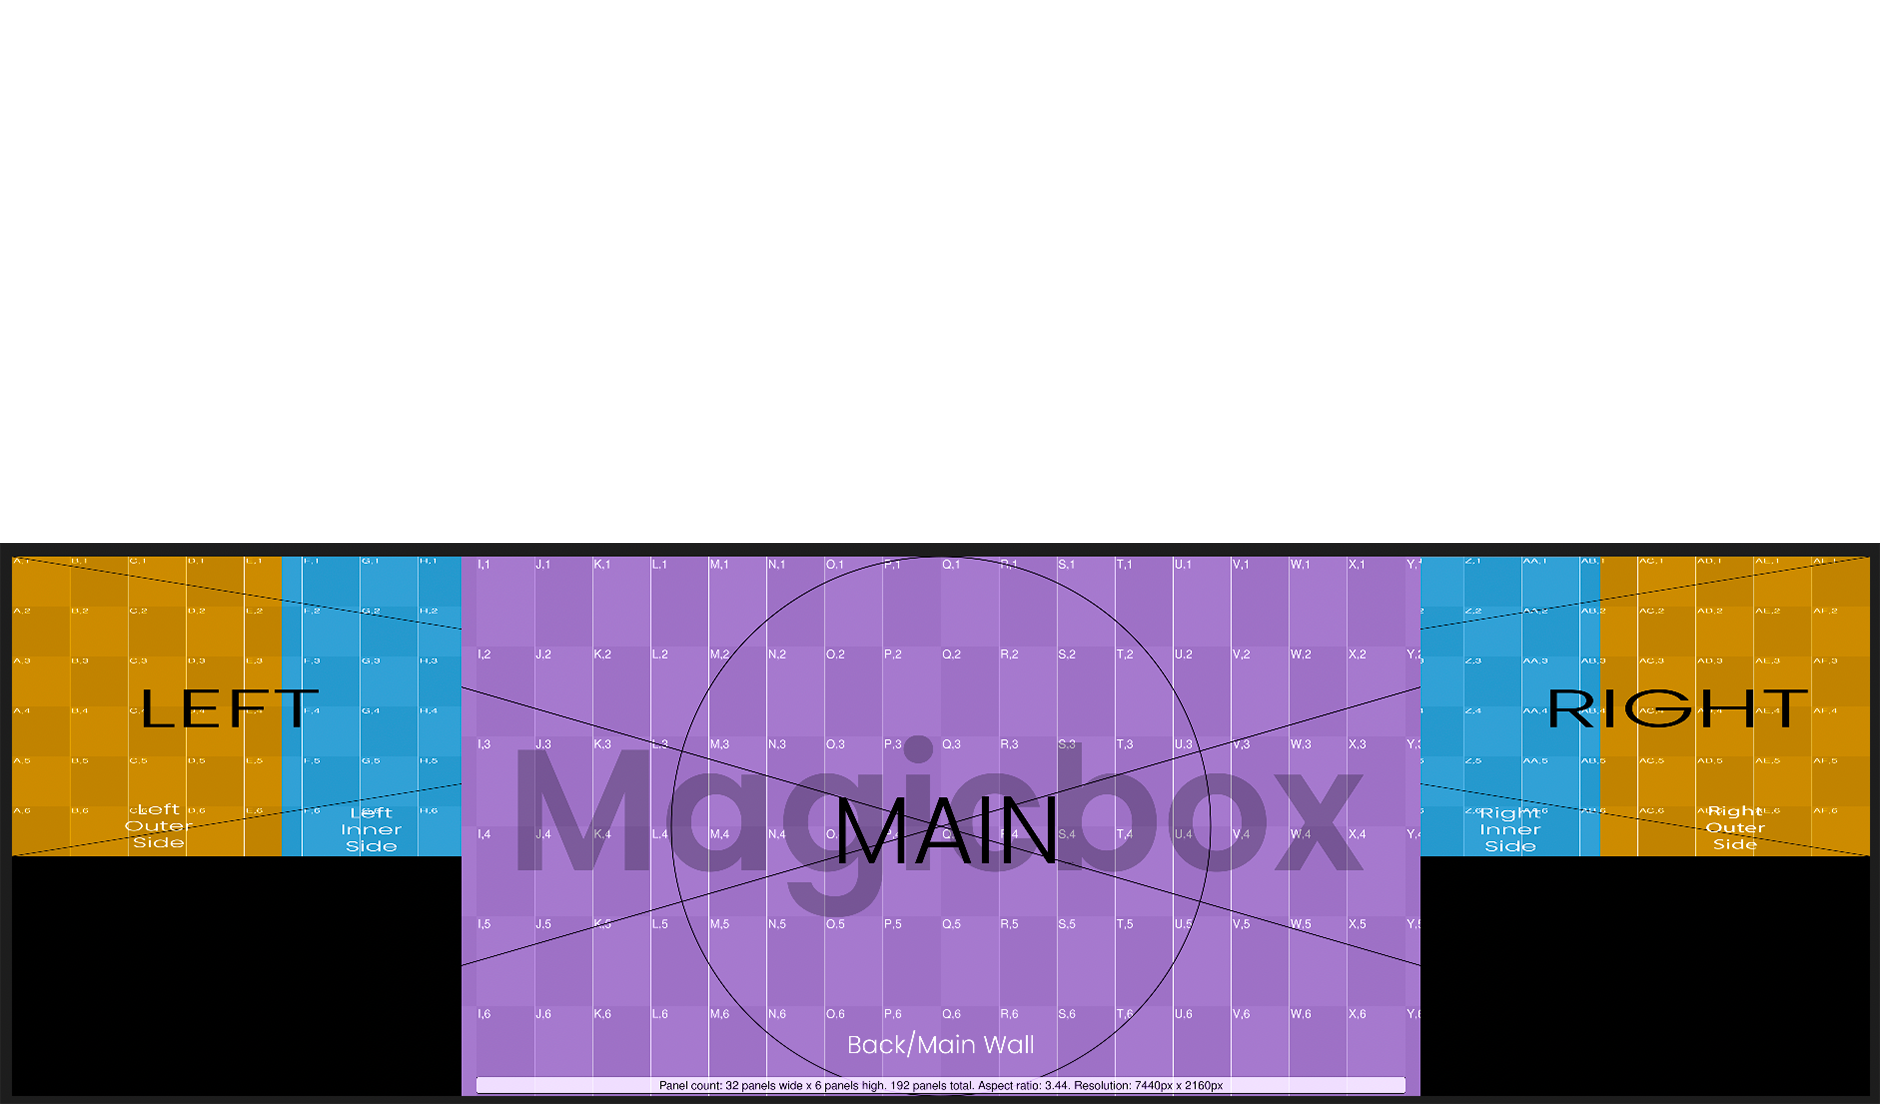
This is a 2D motion graphics workflow for content creators who wish to work in Adobe After Effects. Here you will be abel to animate across all screens in the volume. This enviromnent will enable you to animate quickly in a flat 2D space, then render it for volumetric display onto the walls of our LED volume. However, you will not have the capability to track the camera or display an inner frustum.
Single Video File + Mirrored Ceiling
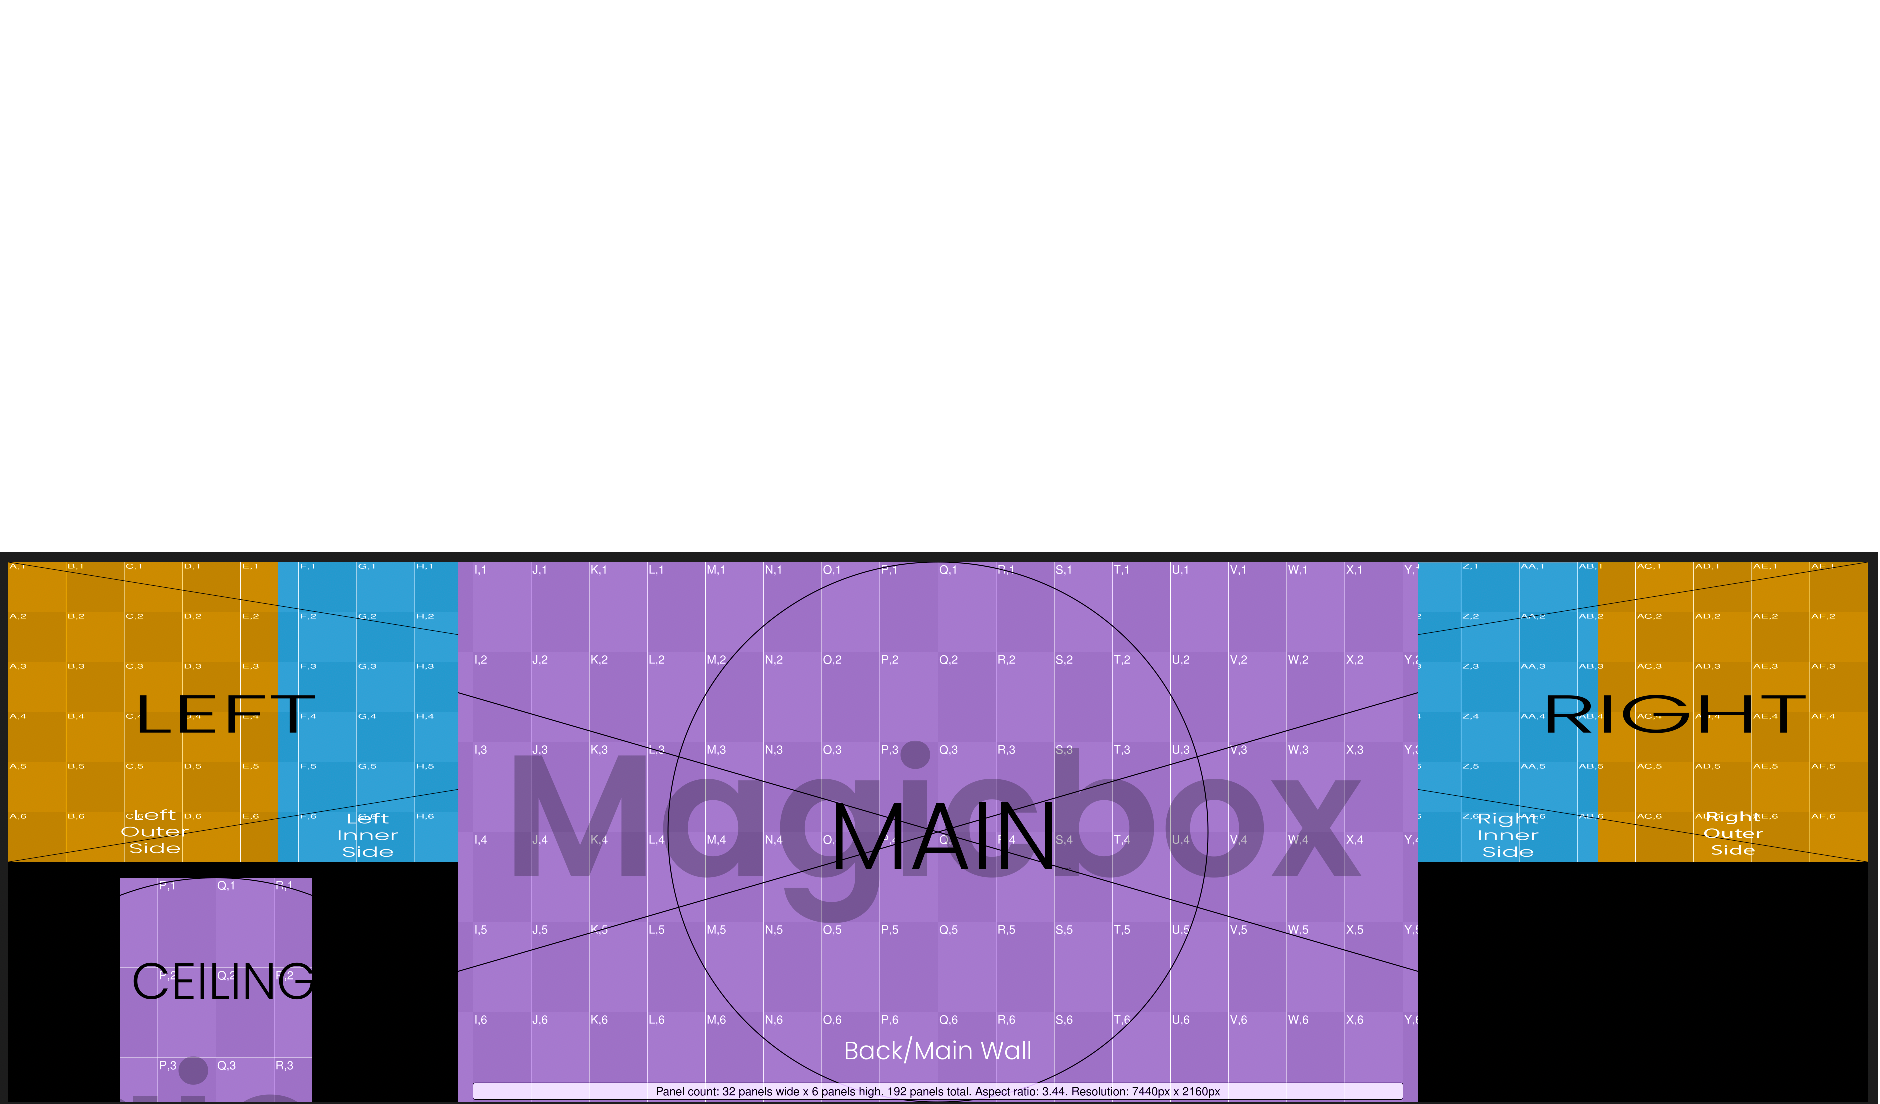
This is a 2D motion graphics workflow for content creators who wish to work in Adobe After Effects. Here you will be abel to animate across all screens in the volume. This enviromnent will enable you to animate quickly in a flat 2D space, then render it for volumetric display onto the walls of our LED volume. However, you will not have the capability to track the camera or display an inner frustum.
Separated Wall & Ceiling Video Files
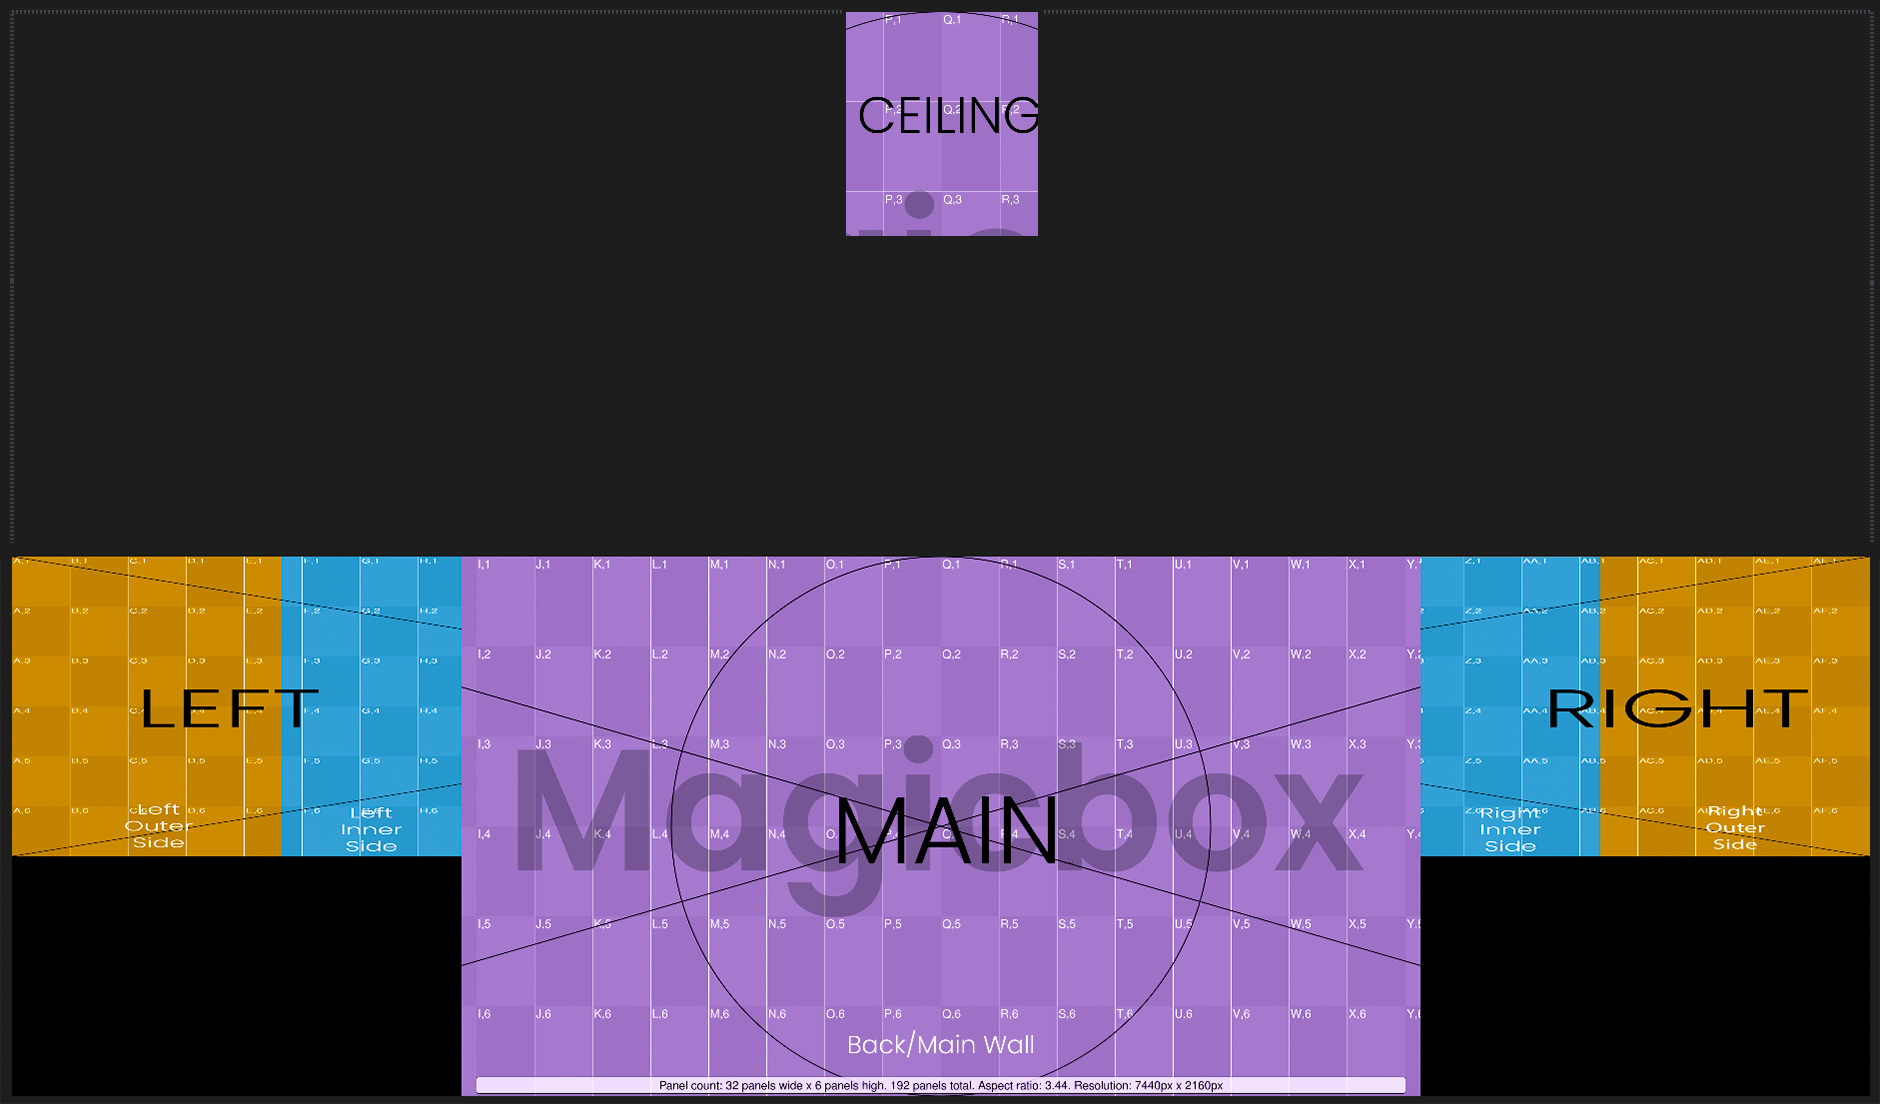
This is a video plate workflow for content creators who wish to produce multi-angled video plates of a real world environment. This is most common with driving plates, however could be utilized for static locations as well. Here you will be abel to view video playback across all screens in the volume, but you will not have the virtual production capability to track the camera or display an inner frustum.
3D Environments
Magicbox is at it's best when you develop your environment using Unreal Engine. This allows you to take full advantage of all the virtual production features such as camera tracking and real-time inner frustum rendering. We currently offer both UE 5.2, and UE 5.3.
You build your environment in Unreal Engine, then package it up and bring it with you on your first rental day. We can have it up on our walls in no time*. Or download our volume templates and integrate our nDisplay and system configuration right into your environment.
2D Motion Graphics
Download the After Effects Template
We've made it simple for you to get started. Just click the After Effects icon above to download the template.
We recommend using one of the two template below to best understand how your content is re-projected onto the different sections of LED displays.

Build Your Animation
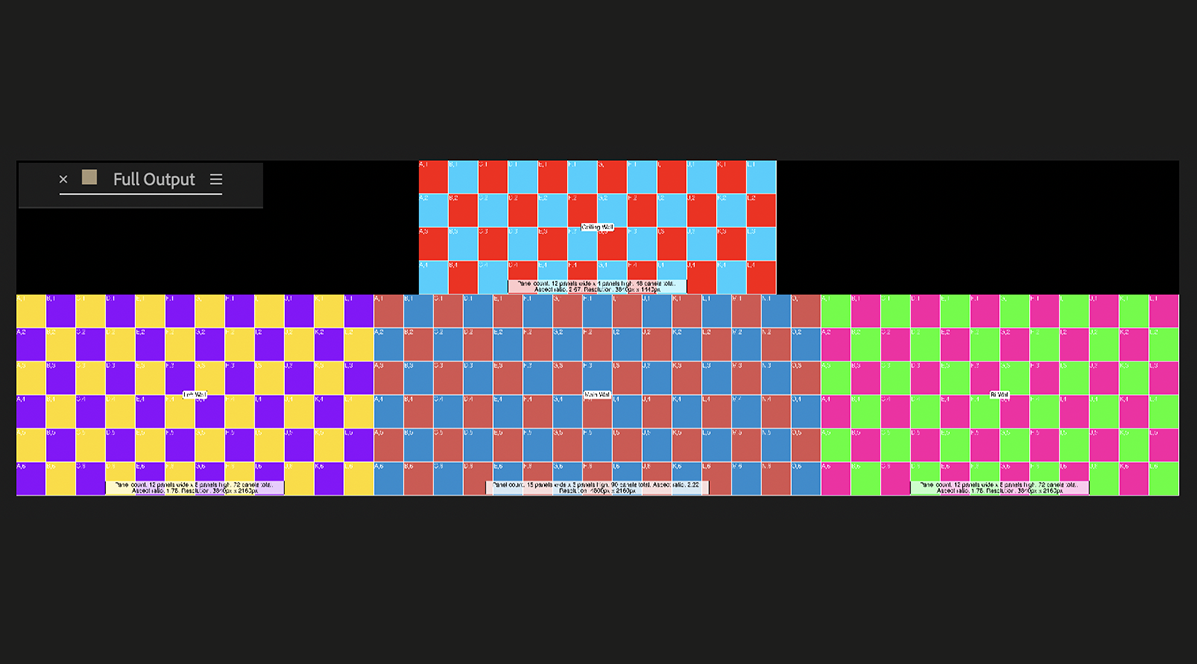
Open the AE project and select the Final Output composition. This is the comp you want to work in. Disregard the other comps in the project, they are for other workflows.
You will find pixel maps in the composition. These images are there for your positioning reference to help you get your bearings. Feel free to hide them as you start to animate. Now you are ready to start animating.
Please Note: Any content you place in the dark areas will not appear on any LED panel inside the Superstudio.
Preview
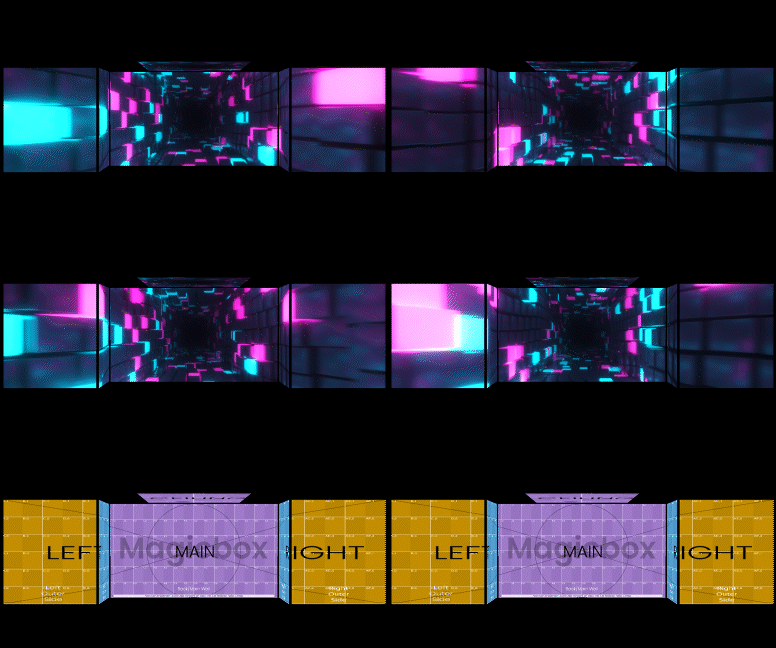
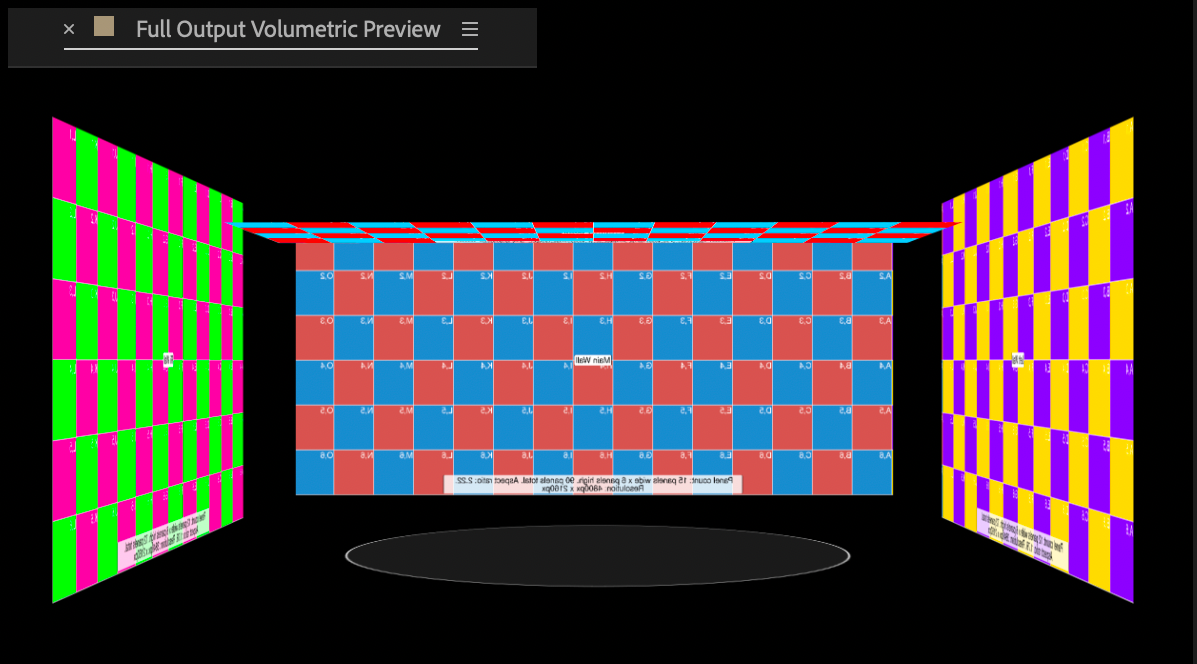
If you want to get feel for how your animation will appear inside the Superstudio, select the Full Output Volumetric Preview composition.
This will display your Final Output comp volumetrically in the same configuration as the LED volume inside Magicbox.
Again you will find pixel maps in this composition. They are there for your positioning reference to help you get your bearings. Feel free to hide them as you start to preview your animation.
2D Motion Graphics Exporting
Codecs
Video files must be delivered in one of the following approved formats. Failure to deliver in on of these formats may result in delays or the inability to display your content.
-
DXV (download codec)
-
NotchLC (download codec) (install Instructions)
-
Pro Res (please deliver in this format, if you do not have access to the previous compressions.)
Frame Rate
To avoid potential artifacts or tears we recommend rendering everything in true 24fps. Do not render in 23.98.
24fps
Naming Convention
We suggest numbering your scenes and shots to keep them organized and to help communicate which animation you want on the LED walls. this is the naming convention we prefer:
Scene Number_Shot Number_Description
e.g. 01_01_Flashy Graphics
Video Plates
Shooting Plates
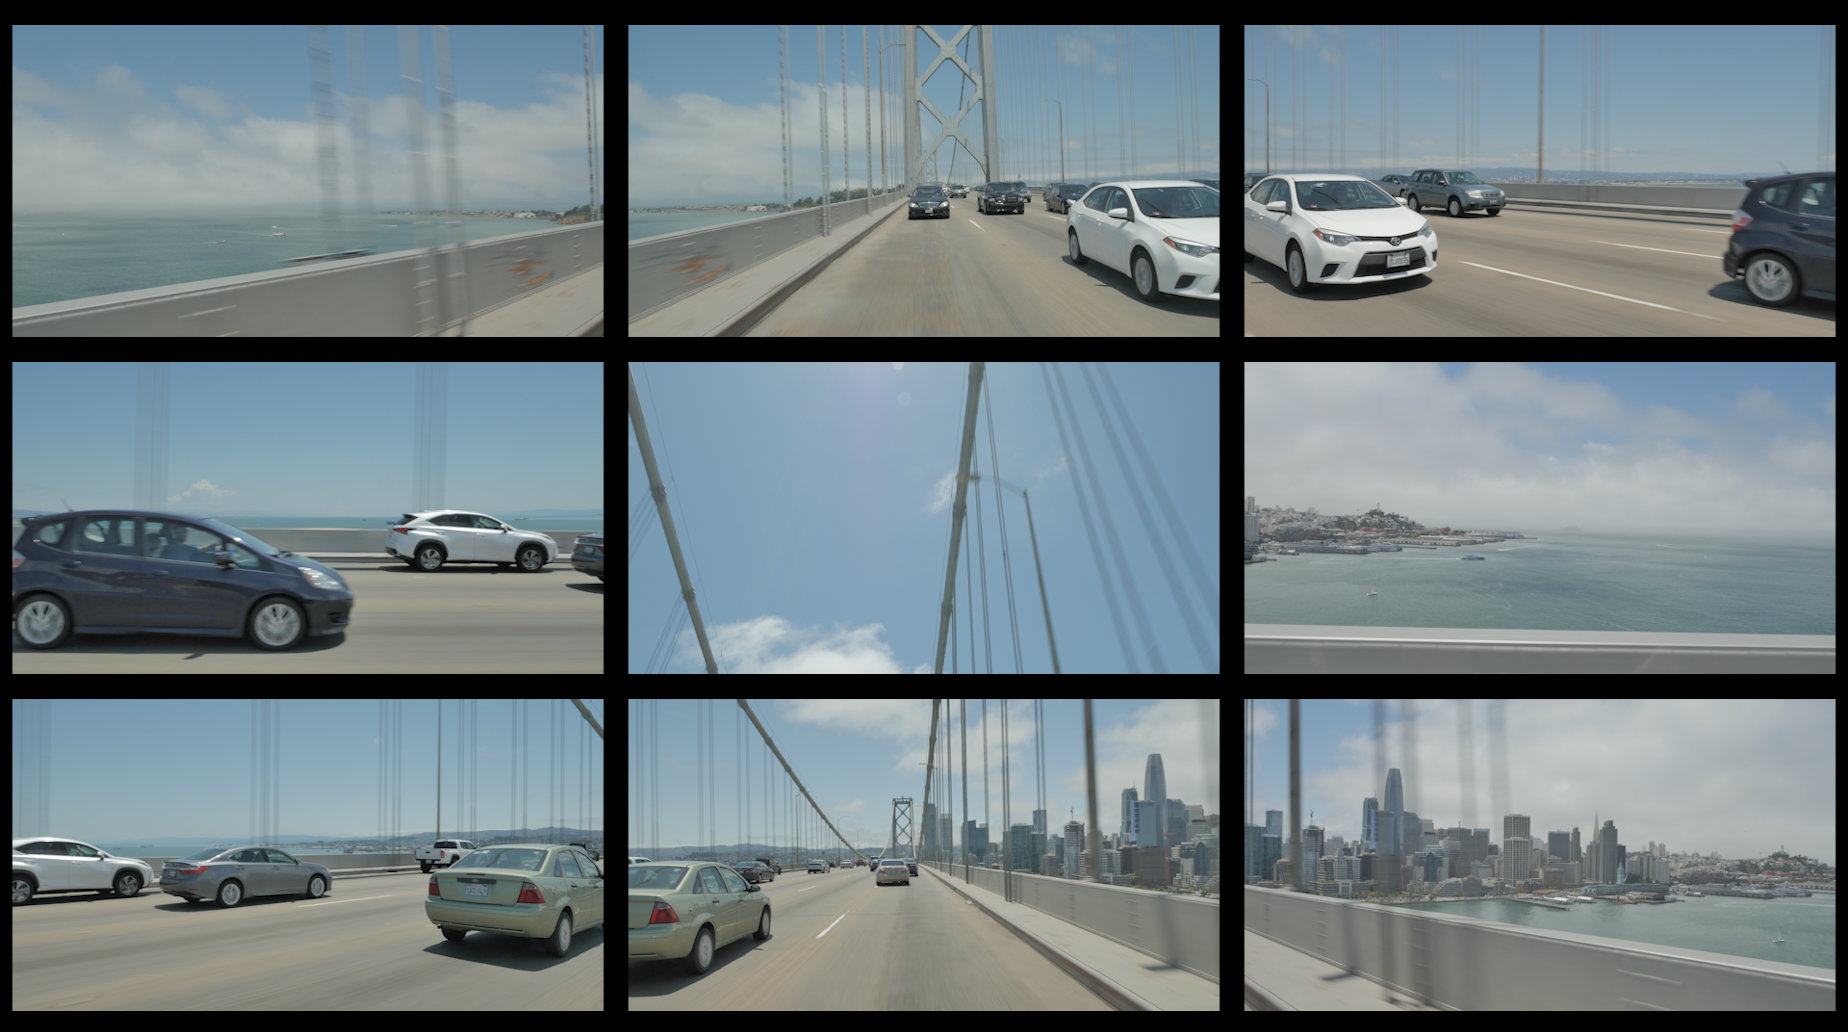
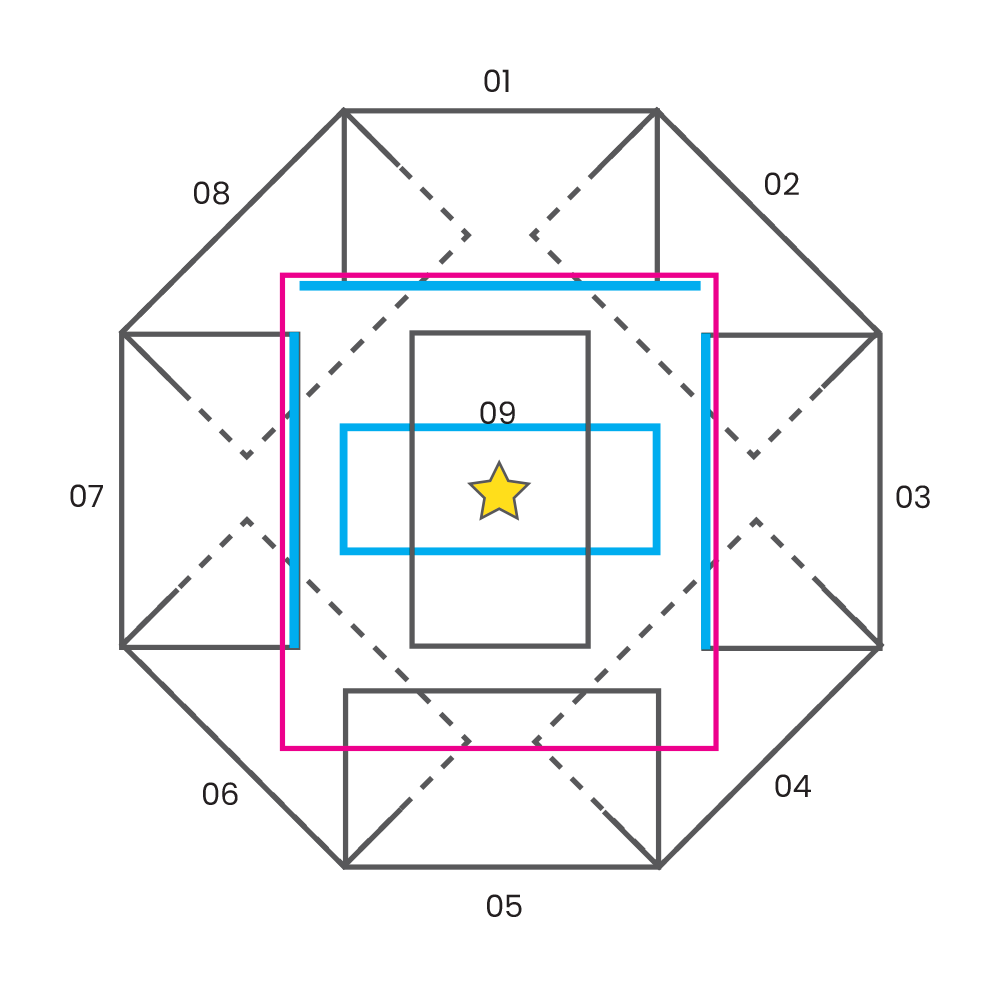
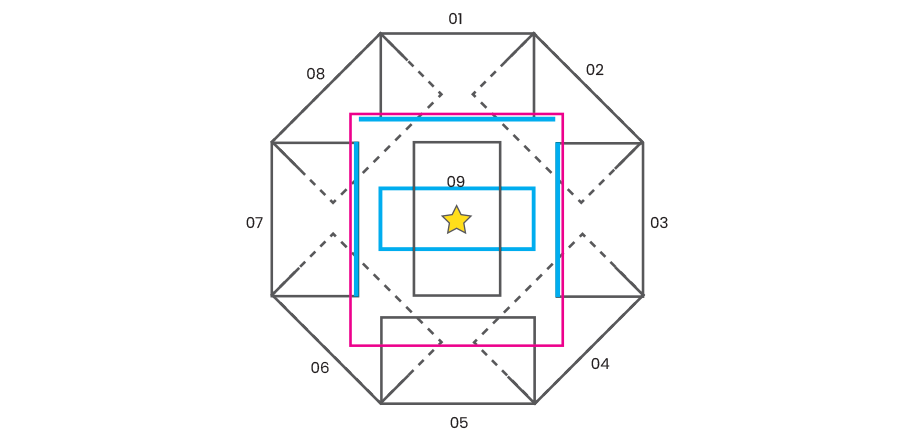
When you produce your plates, we recommend shooting eight angles, every 45-degrees from the POV of the center-point of your environment, and one shot strait up of the sky. The Sky shot is best with a fisheye lens.
If you are shooting driving plates, we recommend using a multi-camera rig. We have partners who can produce these plates for you. Just let us know and we will match you up with the right partner for your budget.
Resolution, Frame Rate & Format
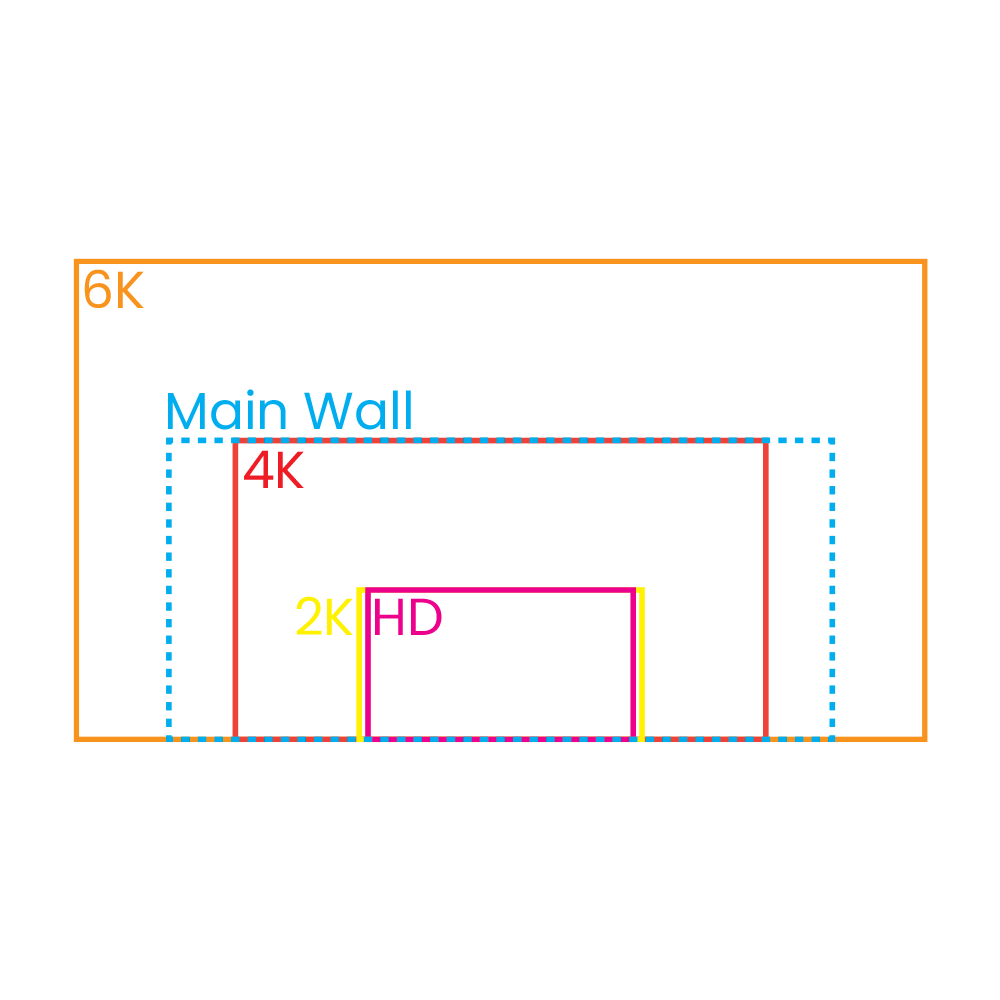
The main wall in the Superstudio is slightly larger than 4k resolution. To give you maximum play adjusting content positions inside the LED studio, we recommend shooting your plates at 6K resolution.
Resolution: 6K
Frame Rate: True 24fps (not 23.98)
Format: Pro Res (Uncompressed)
Color: LOG
Video Plates
Select Your In & Out Points
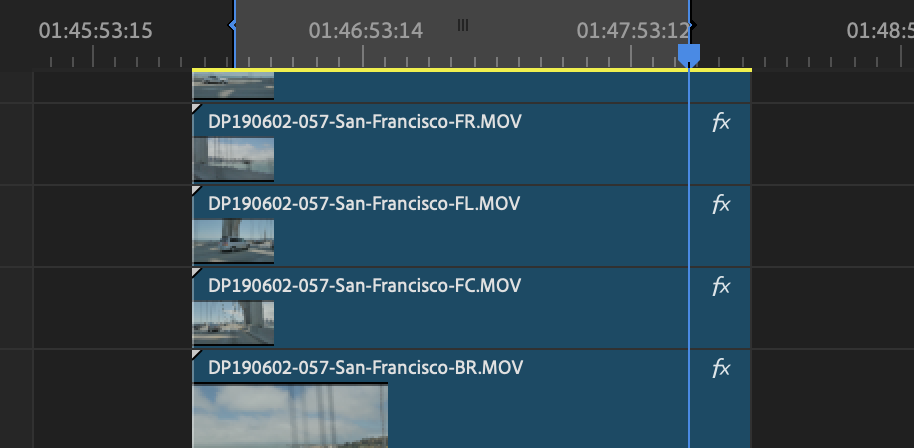
Watch the playback a few times and mark the in-point and out-point for the section of the footage you like the most for your shot. Be sure to pad the starting point and end point with at least 1-second to 10-seconds of additional footage.
The Duration of the shot will be determined by the action of the shot. If nothing in the environment is moving consider a very short duration, such as 10-seconds. For long scenes consider 2-minutes to 5-minute shots.
Please Note: the longer the shot, the longer it will take to transcode and ingest into the system.
Export & Name Your Clips
Export each clip with the same in-point and out-point. Again, don't forget to add handles of a few seconds ant the beginning and end. This should be the same for all nine shots. Name the shots like this:
Scene Number_Shot Number_Description_Camera Number
01_001_Deserted Highway Night_01.mov
01_001_Deserted Highway Night_02.mov
01_001_Deserted Highway Night_03.mov
We can take it from here. But if you want to preview your shots or set up a scene, move on to the next step.
Video Plates
Import Your Shot Selects
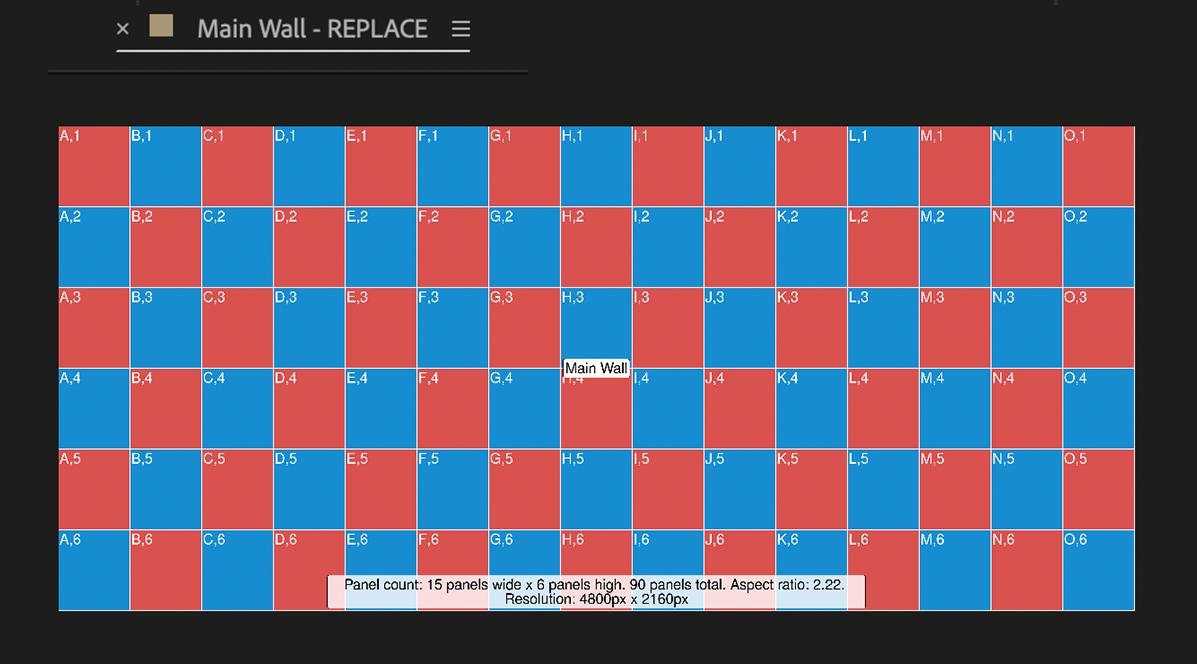
Open the AE project and open the compositions for the Main, Left, Right, Ceiling. Disregard the other comps in the project for now. The pixel maps in the composition are there for positioning reference. Feel free to hide them.
Import your edited selects. Determine the scene and shot you want to set up. Drop the primary shot you will shoot against onto the Main Wall comp, then the next Camera Shot onto the Right Wall, and so on for the Left Wall and the Ceiling.
Preview Your Shots
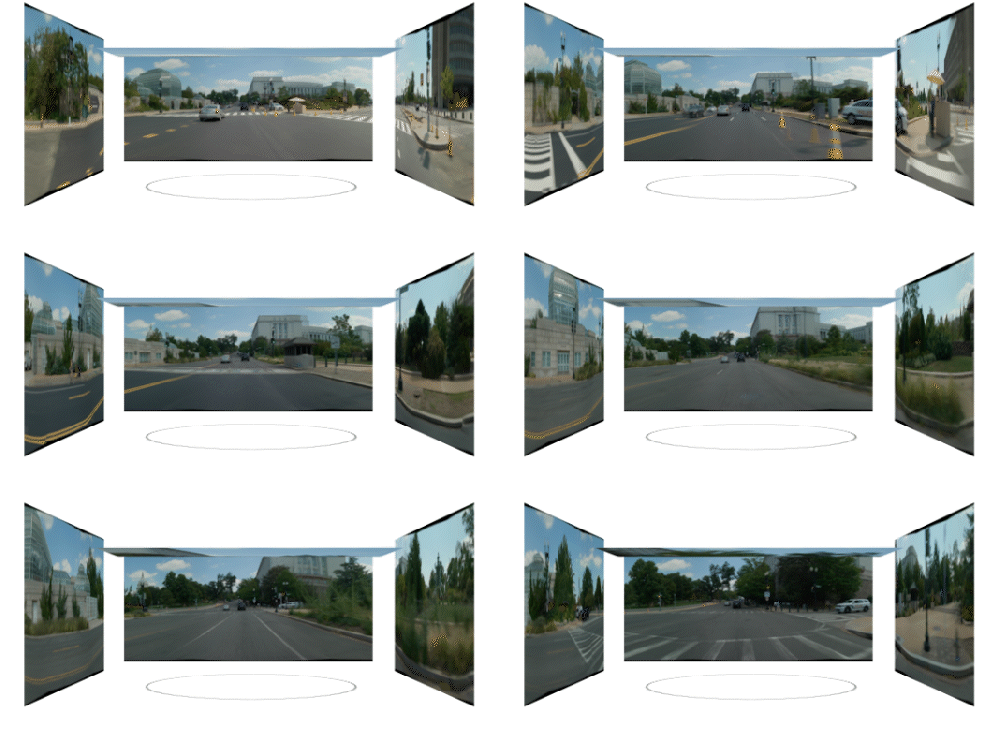
After you've placed all your camera shots on the walls and ceiling, select the Full Output Volumetric Preview composition to see how it will appear inside the Superstudio, and press play.
If your shot is moving, make sure all the clips are moving in the same direction. You may need to go back and swap some shots, or rotate the ceiling shot to get everything playing properly.
Video Plates
Export Scenes
If you want to lock in a scene and shot angle you can do so by exporting the Full Output composition. This may make things faster if you have lots of scenes and shots, and you know exactly what you want.
However, this will also lock you in to this perspective, and limits the adjustments you can make once you are on set.
Delivery
be sure to export all your files using the proper naming convention, frame rate, and codecs.
Put all your files on a hard drive that is formatted for a PC, or for transfer from a MAC to a PC.
Bring the drive and a cable to your shoot inside Magicbox.
2D Motion Graphics Exporting
Codecs
We can accept pretty much any type of video file. However, if you do not provide your files in one of these recommended codecs, we may need to spend valuable time recompressing your files into one of these formats on the day of your production.
-
NotchLC download codec (PC's only)
-
H264
-
HVEC (H265)
-
Pro Res (will require transcoding on site)
Frame Rate
To avoid potential artifacts or tears we recommend rendering everything in true 24fps. Do not render in 23.98.
24fps
Naming Convention
We suggest numbering your scenes and shots to keep them organized and to help communicate which animation you want on the LED walls. this is the naming convention we prefer:
Scene Number_Shot Number_Description_Camera Number
01_001_Deserted Highway Night_01.mov
01_001_Deserted Highway Night_02.mov
01_001_Deserted Highway Night_03.mov
2D Motion Graphics Exporting
Codecs
Video files must be delivered in one of the following approved formats. Failure to deliver in on of these formats may result in delays or the inability to display your content.
-
DXV (download codec)
-
NotchLC (download codec) (install Instructions)
-
Pro Res (please deliver in this format, if you do not have access to the previous compressions.)

Frame Rate
To avoid potential artifacts or tears we recommend rendering everything in true 24fps. Do not render in 23.98.
24fps

Naming Convention
We suggest numbering your scenes and shots to keep them organized and to help communicate which animation you want on the LED walls. this is the naming convention we prefer:
Scene Number_Shot Number_Description
e.g. 01_01_Flashy Graphics

